Mastering Japanese Straightening Step by Step at John Azzi
- salons
- Jan 8
- 3 min read
Updated: Feb 2
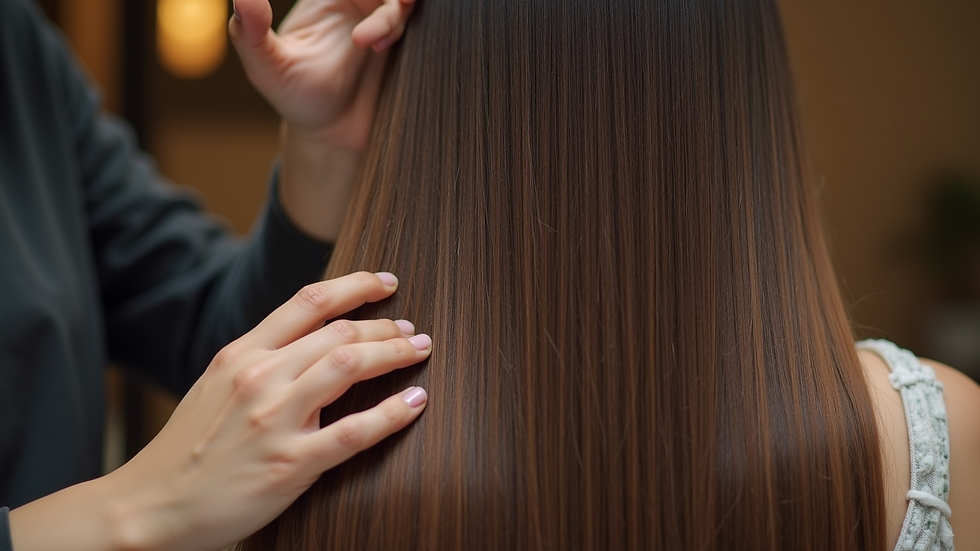
Japanese Straightening: Your Path to Sleek, Smooth Hair at John Azzi Hairdressers
Japanese Straightening offers a long-lasting solution for those who want sleek, smooth hair without daily hassle. At John Azzi, this treatment transforms hair texture with precision and care, delivering results that last for months. If you’ve been curious about how Japanese Straightening works and what to expect, this guide breaks down the process step by step, helping you understand how to get the best outcome for your hair.

Understanding Japanese Straightening
Japanese Straightening, also known as thermal reconditioning, is a chemical process that permanently alters the structure of curly or wavy hair to make it straight. Unlike temporary straightening methods, this treatment changes the hair’s protein bonds, resulting in smooth, shiny hair that stays straight even after washing.
At John Azzi, the process is tailored to each client’s hair type and condition, ensuring minimal damage and maximum shine. The treatment suits people who want a low-maintenance style without sacrificing hair health.
Step 1: Consultation and Hair Analysis
Before starting the treatment, the stylist at John Azzi conducts a thorough consultation. This step is crucial to assess your hair’s current condition, texture, and history of chemical treatments. The stylist will:
Examine hair porosity and strength
Discuss your hair goals and lifestyle
Recommend the best approach based on your hair type
This personalized consultation helps avoid damage and ensures the treatment suits your hair’s needs.
Step 2: Preparing the Hair
Once the consultation is complete, the stylist prepares your hair for the treatment. This involves:
Washing hair with a clarifying shampoo to remove buildup
Towel drying to keep hair damp but not wet
Sectioning hair for even application
Proper preparation ensures the straightening solution penetrates the hair evenly, which is key to achieving smooth results.
Step 3: Applying the Straightening Solution
The core of Japanese Straightening is the application of a specially formulated chemical solution. At John Azzi, the stylist applies this solution carefully, section by section, to break down the hair’s internal bonds. This step requires precision and experience because:
The solution must stay on for the right amount of time
Over-processing can cause damage
Under-processing results in incomplete straightening
The stylist monitors the hair closely during this phase to achieve the perfect balance.
Step 4: Rinsing and Blow-Drying
After the solution has processed, the hair is rinsed thoroughly to remove all chemicals. Then, the stylist blow-dries the hair straight using a round brush. This step helps to:
Remove excess moisture
Begin the reshaping process
Prepare hair for flat ironing
Blow-drying straight is essential because it sets the foundation for the next step.

Step 5: Flat Ironing for Permanent Straightening
The most critical step in Japanese Straightening is flat ironing. The stylist uses a high-quality flat iron set to a specific temperature to seal the hair’s new shape. This step:
Locks in the straight texture
Smooths the hair cuticle for shine
Ensures the straightening lasts for months
At John Azzi, the stylist works carefully to avoid overheating, which can cause damage. The flat ironing is done in small sections for even heat distribution.
Step 6: Neutralizing and Final Rinse
After flat ironing, a neutralizer is applied to restore the hair’s pH balance and lock in the new structure. This step is vital because it:
Stops the chemical process
Strengthens the hair bonds in their new shape
Prevents damage and breakage
Once the neutralizer has set, the hair is rinsed again and gently dried. The stylist may apply a finishing serum to enhance shine and softness.
Aftercare Tips for Long-Lasting Results
Maintaining your Japanese Straightening results requires some care. Here are practical tips recommended by John Azzi stylists:
Use sulfate-free shampoos and conditioners to protect hair
Avoid washing hair daily; 2-3 times a week is ideal
Apply heat protectant before using styling tools
Schedule touch-ups every 6-12 months depending on hair growth
Avoid chlorine and saltwater exposure or use protective treatments
Following these tips helps keep your hair smooth, shiny, and healthy for longer.
Why Choose John Azzi for Japanese Straightening
John Azzi stands out for its expert stylists and personalized approach. The team combines advanced techniques with high-quality products to deliver safe and effective Japanese Straightening. Clients appreciate the attention to detail and the natural-looking results that last.
If you want to transform your hair with Japanese Straightening, John Azzi offers a welcoming environment and skilled professionals who guide you through every step.
Experience the Transformation!
Are you ready to embrace a new look? Japanese Straightening can give you the sleek, shiny hair you’ve always dreamed of! At John Azzi, we prioritize your comfort and satisfaction. Our team is here to ensure you have a delightful experience from start to finish.
Imagine stepping out with hair that feels luxurious and looks fabulous! You deserve this transformation!
So, why wait? Book your appointment today and discover the magic of Japanese Straightening at John Azzi!
For more information about our services, visit John Azzi Hairdressers.


Comments